
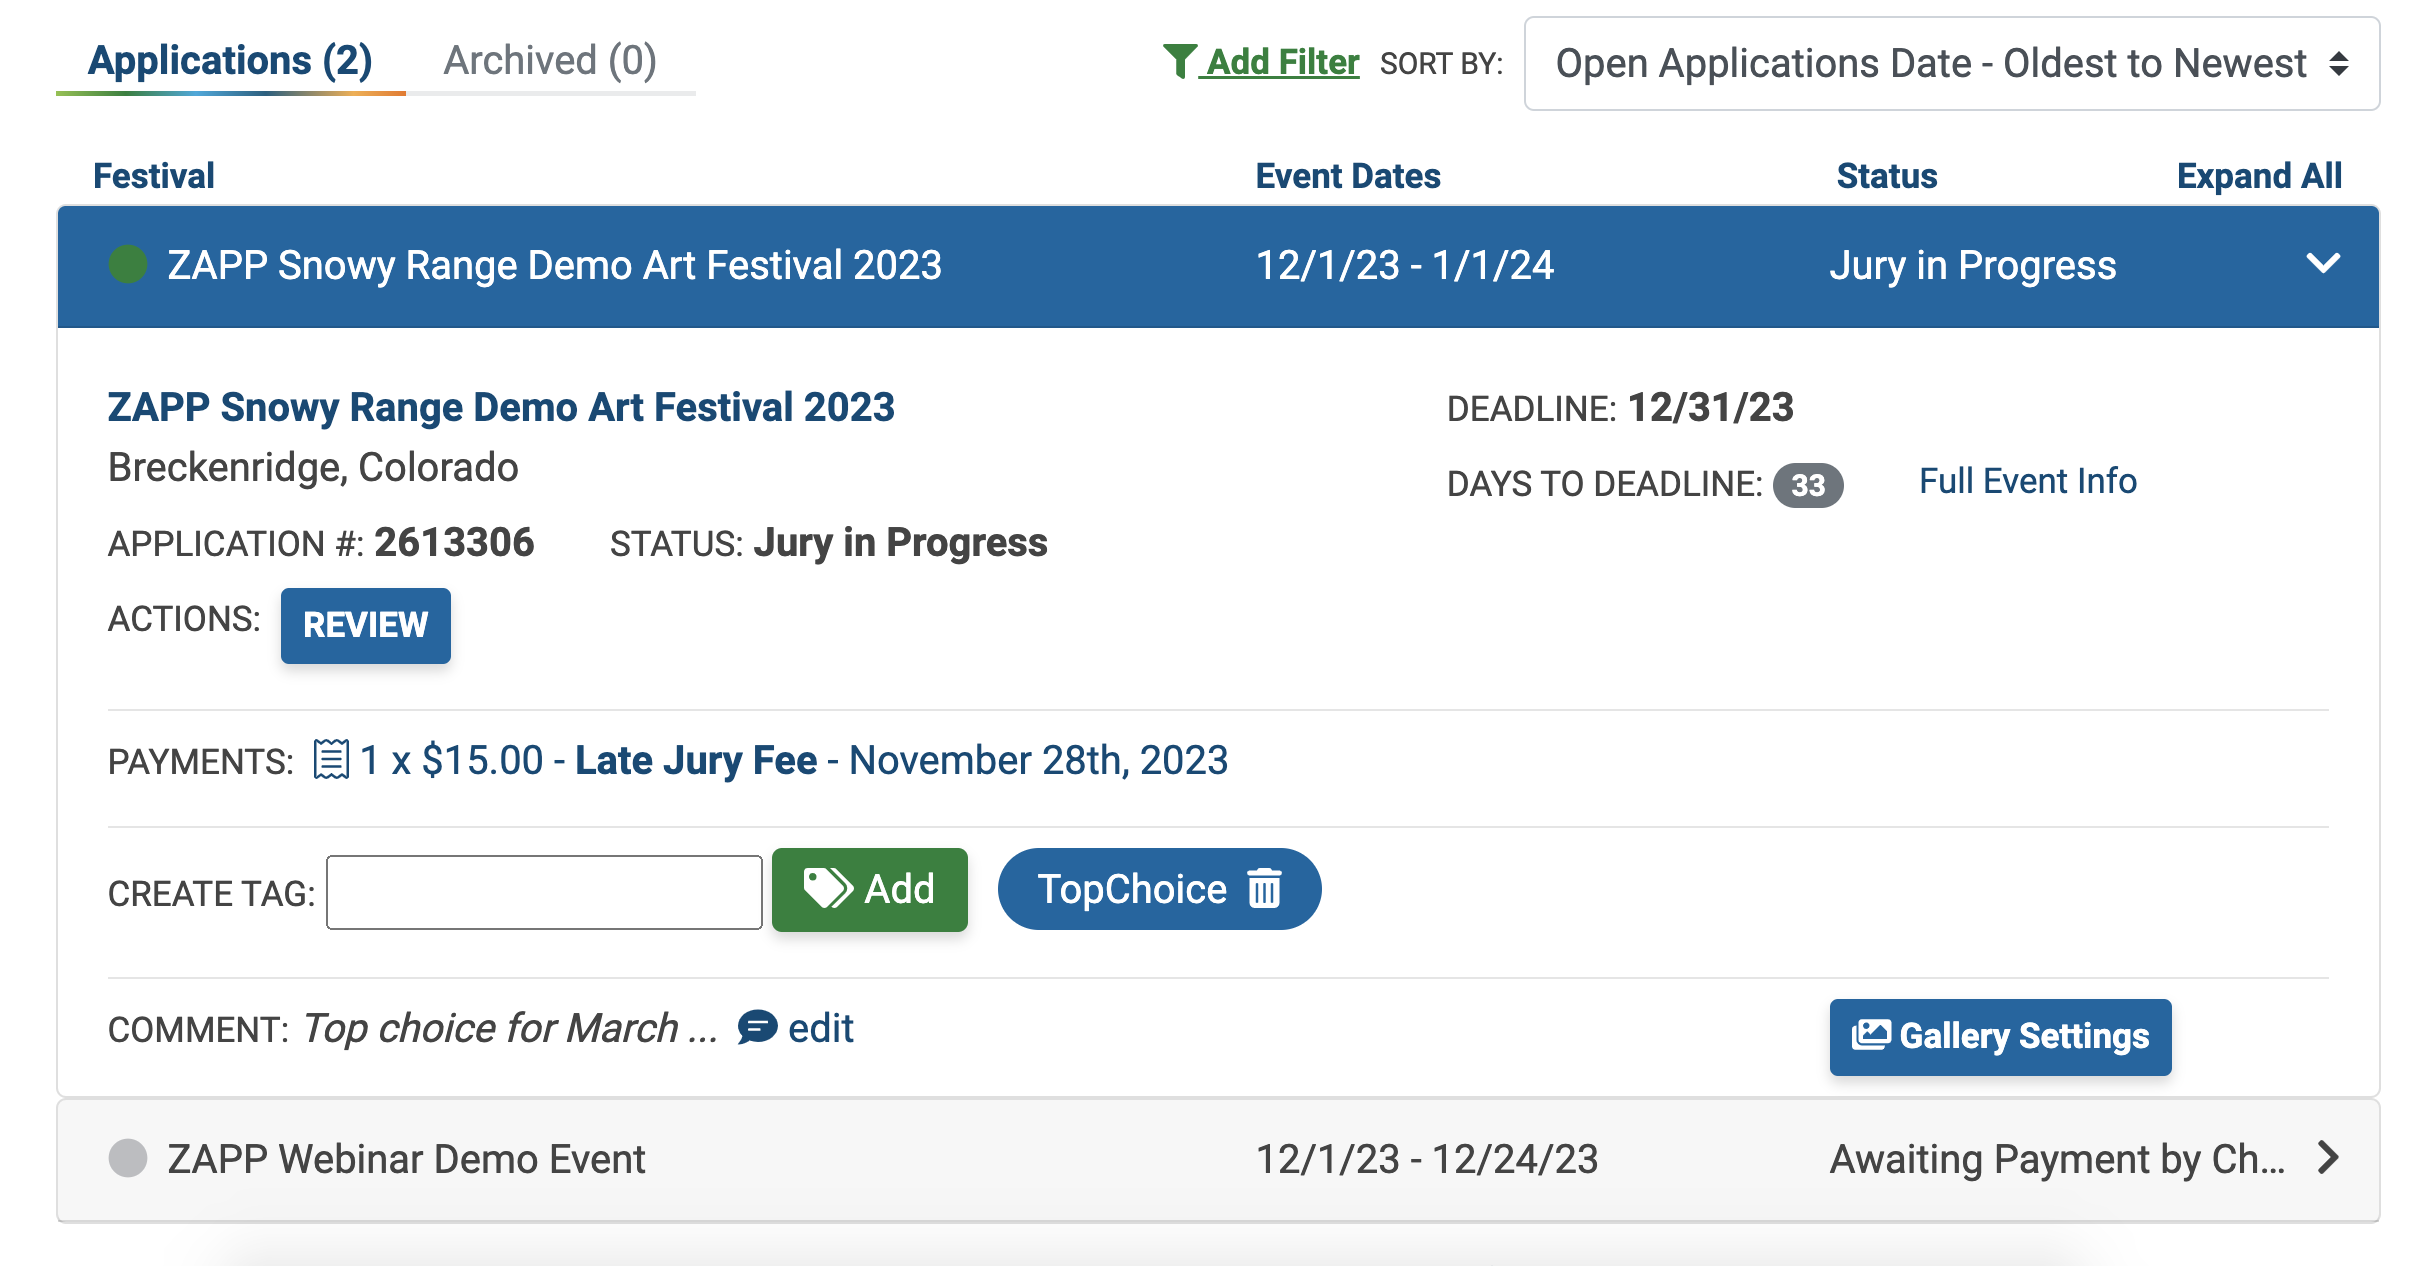
The My ZAPPlications page serves as your ZAPP homepage, showing a list of started and completed applications, the application statuses, past payments, and key event information. Click on a dot to learn how to use each section of the My ZAPPlications page or scroll to see a full list of definitions.
Managing Applications on ZAPP
A Breakdown of the My ZAPPlications Page
Definitions:
- Applications/Archived: Applications are sorted into two main categories: current applications and archived applications. To switch which application category you’re viewing, click on either “Applications” or “Archived.”
- Add Filter: Click “Add Filter” to view only applications in a status or group of statuses or to view only applications by tag. To select more than one application status or tag, click and drag your mouse or hold the command (Mac) or control (PC) button and select the tags or statuses for the applications you want to view.
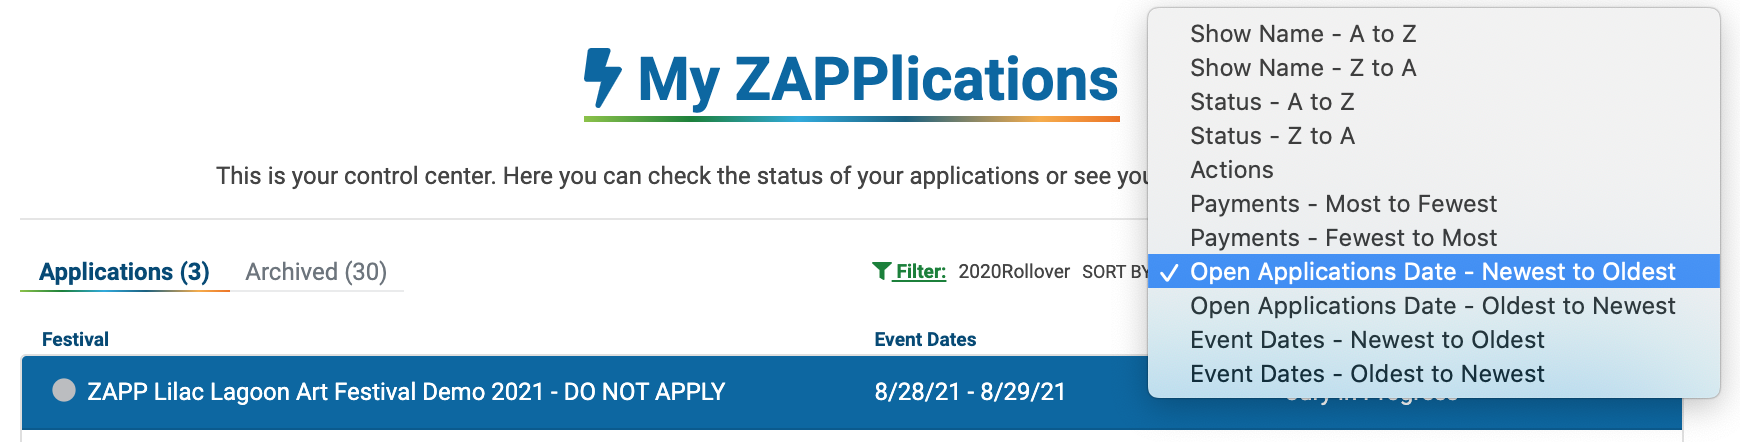
- Sort By: Click the drop down to sort your applications by Show Name, Status, Action, Payments, Open Applications Date, or Event Dates. You can also sort your applications by clicking on the table headers.
- Expand All/Collapse All: Click “Collapse All” to see only event names, event dates, and your application status. Click “Expand All” to see all application information, tags, comments, and action items.
- Application ID: The unique ID attached to your application. Include this ID when communicating with ZAPP or event organizers about your application.
- Status: The status your application is currently in. For a breakdown of what each status means, jump to Application Status Definitions.
- Actions: This section contains buttons for certain actions you may need to take for your application. For a breakdown of what each action item means, jump to Application Actions.
- Payments: This section contains a list of all payments made to the event. To view and download the receipt for a specific payment, click on the payment. Jump to Reviewing Payments for more information.
- Tags: Use tags to help categorize or group your applications. Applications can have up to four custom tags. To enter a tag, type a word or phrase without spaces into the text box and click “Add.” Jump to Adding Tags and Comments to Applications to learn more.
- Comments: Click “add” to leave a comment (visible to you only) to your application to help stay organized. Comments can be up to 250 characters long. Jump to Adding Tags and Comments to Applications to learn more.
- Notification Date: The date the event organizers will notify you of the status of your application. Not all events share a notification date so you may not see this field.
Event Galleries
Events on ZAPP can create an Event Gallery with images from Accepted and Confirmed artists. The gallery will include artwork images submitted with the application, basic information, and artist websites (if one was provided). Patrons can browse artists by medium category, search for a specific artist, or sort your gallery by booth number. While you are automatically opted in to the gallery, you will see the option to opt out of the gallery by event on your My ZAPPlications page. You will only be able to opt in or out of the gallery if the event is using the Event Gallery feature on ZAPP.
What does my application status mean?
- Started: You have started the application but have not submitted it to the event.
- Ready for Submission: Your application is completely filled out and is ready to submit. The event has not received your application until you purchase the application or jury fee and submit your application.
- Awaiting Payment by Check: The event has received your application and is waiting for your check payment. Check payments should be mailed directly to the event.
- Received: You successfully submitted your application. The event has received the application.
- Incomplete: The event administrator is requesting or allowing you to make modifications to your application. You can re-submit without incurring additional application/jury fees. Applications in this status must be resubmitted before the application deadline.
- Exception: The event administrator is requesting or allowing you to make modifications to your application after the application deadline. Make edits and let the administrator know when you are finished so they can move you back to the appropriate status.
- Withdrawn: Your application has been withdrawn and is no longer under consideration by the event. For questions about a withdrawn application or to withdraw your application, contact the event organizers.
- Jury in Progress: The jury process has started. Applications are being scored.
- Invited: The event has invited you to participate.
- Not Invited: The event has not invited you to participate.
- Accepted: You have accepted the event’s invitation to participate.
- Declined: You have declined the event’s invitation to participate.
- Confirmed: You have purchased a booth and/or confirmed your intent to participate in the event.
The list above reflects the way these statuses are typically used; however, events may have different processes. You should contact the event directly if you have questions about your application status.
Adding Tags and Comments to Applications
On each application, you will have the option to add a tag or leave a comment. Comments or tags can only be seen by you — event administrators will not be able to view your comments or tags.
To add a tag to an application, enter your tag into the “Create Tag” text box and click “Add.” Tags must be 12 characters or fewer and cannot contain any spaces.
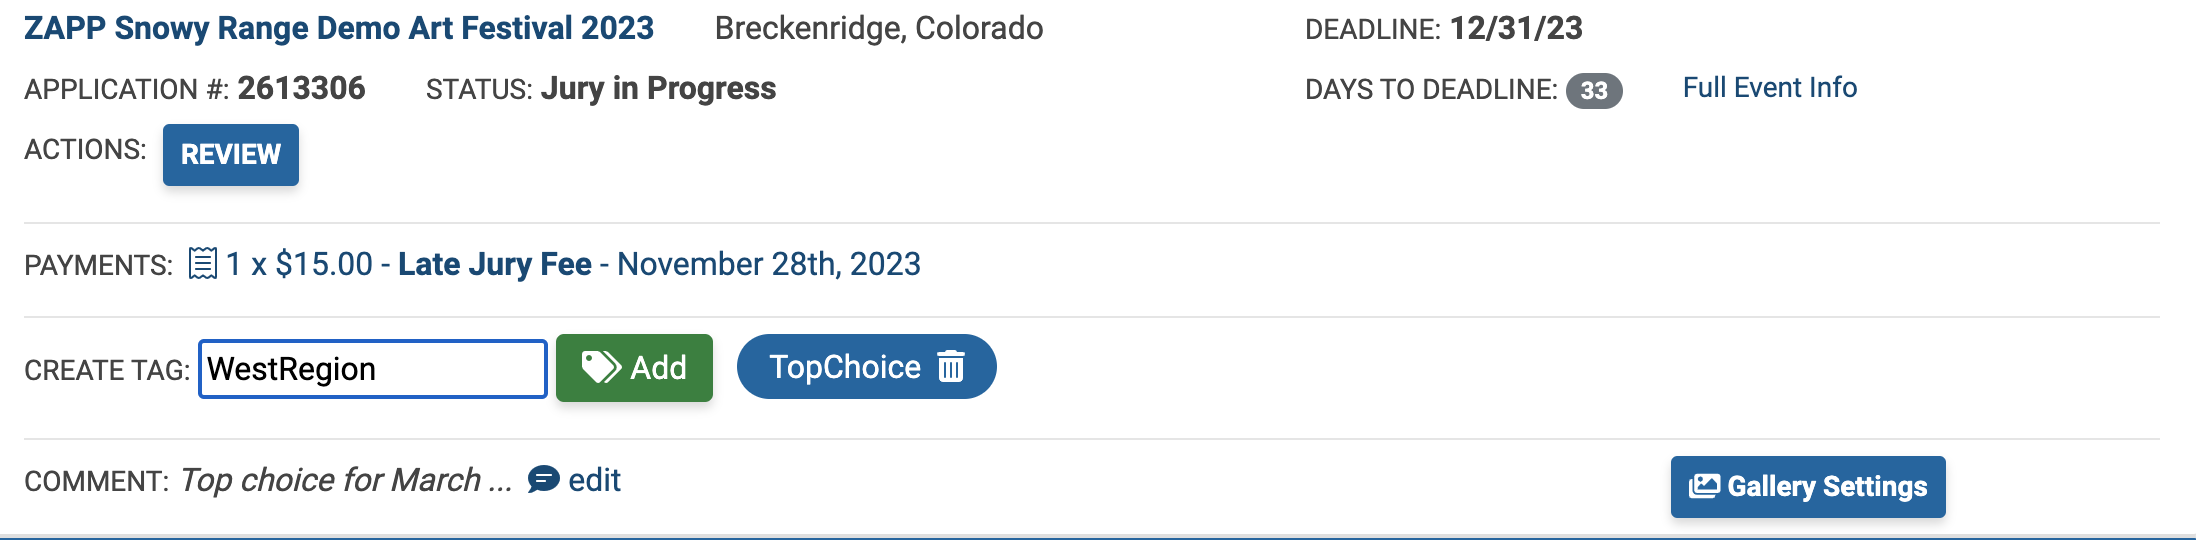
Add up to five tags to any application. To delete a tag, click on the trash icon next to the tag. Applications can also be filtered by tag. Jump to Filtering and Sorting Applications to learn more.
To add a comment to your application, click the “add” link. An “Add Comment” pop up will appear:
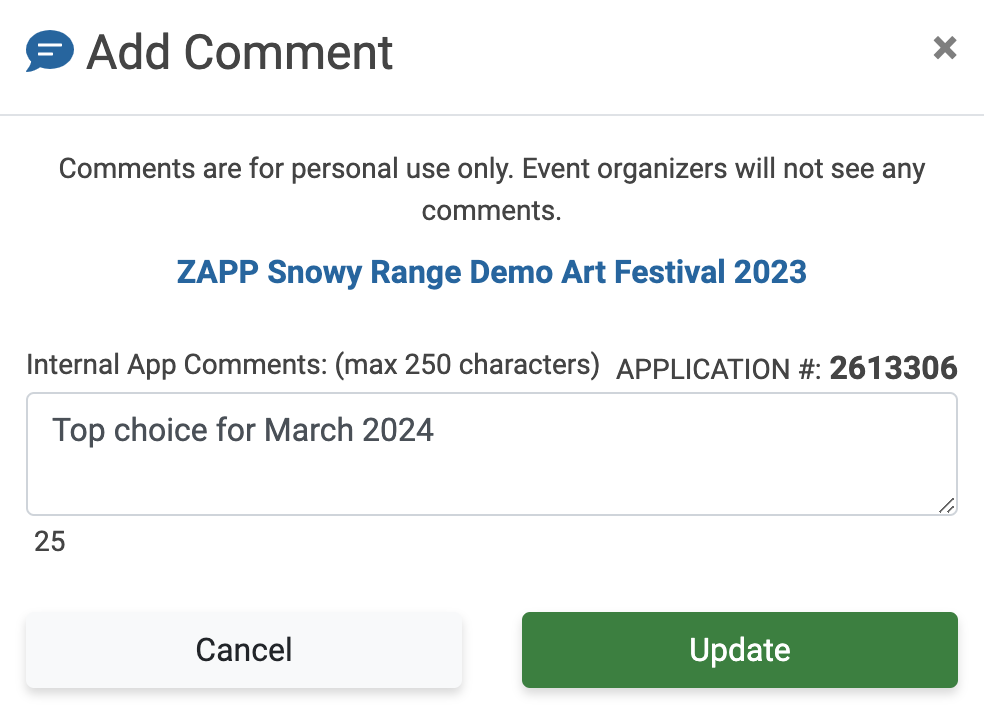
Enter your comment into the text box and hit “Update.” Comments can be up to 250 characters. Once added, you can edit comments by clicking the “Edit” link. To delete a comment, click “Edit,” delete any text entered, and click “Update.”
Filtering & Sorting Applications
There are a variety of options for filtering and sorting your applications on the My ZAPPlications page. To view only applications in a certain status or under a specific tag, click the green “Filter” link to open the filter pop up. You can choose to filter your applications by either application status or by your custom tags.
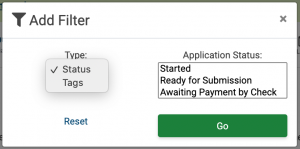
First select your filter type, and then select the application status(es) or tag(s) you want to view. Click “Go” and you will only see applications that are within the status(es) selected or tagged with the selected custom tag.
To remove the filter, click on the “Filter” link again and then click the “Reset” link.
Note: Selected filters will apply to both your current applications and your archived applications. If you selected a filter and there are no applications in that status or under that tag within the section of the My ZAPPlications page you are in, you will get an error message that states “No events match your filters.”
To sort applications, you can either use the Sort By drop down or you can click on the table headers. If using the Sort By drop down, select the way you would like to sort the page from the list.
Application Actions
Once you start an application and once the event you applied to goes through its application cycle, you may see a series of buttons show up under the “Actions” section of the application:
- Finish Draft: The “Finish Draft” option will display if your application has been started but not completed or if your application has been moved to the Incomplete or Exception status. Click the button to finish or edit your application.
- Remove: The “Remove” option will appear if your application has not been submitted to the event. Clicking the button will allow you to delete the application. Applications that have been submitted cannot be deleted.
- Checkout: The “Checkout” option will show if you have completed but not yet submitted your application for an event. To submit your application, click the “Checkout” button and purchase the application or jury fee. Even if the fee is $0, you still need to check out the fee to submit your application.
- Review: The “Review” option will display as soon as you have completed your application. Clicking “Review” will take you to your application so you can review your submission.
- Accept or Reject Invitation: If you are invited to an event and placed in the Invited status, you will have the option to accept or reject your invitation. Accepting the invitation will move you to the Accepted status. Rejecting the invitation will move you to the Declined status.
- Add Booth Request: If the event is collecting booth requests from Invited artists, you will see the “Add Booth Request” button. This will take you to the Booth Request page where you will answer questions regarding your booth request. Note: Not all events on ZAPP collect booth requests.
- Purchases: After you have accepted your invitation, you will see a “Purchases” button. Clicking “Purchases” will take you to the ZAPP Shop to purchase booth products. Note: Not all events on ZAPP sell booth products.
- Archive: If you are not invited to the event or if the event dates have passed, you will have the option to archive your application. Archiving your application will move your application from the active applications section of the My ZAPPlications page to the archived applications section. Note: If you need an application unarchived, email the ZAPP team at contactzapp@wearecreativewest.org.
Submitting Booth Requests
Some events on ZAPP collect booth requests from invited applicants to gather additional information before assigning booths. Some events will require you to submit your booth request before you purchase your booth, while others will require you to submit it after you purchase your booth. When booth requests are being collected, you will see the Add Booth Request button in the Actions section next to the corresponding show on your My ZAPPlications page.
")
How to Submit a Booth Request:
- Click Add Booth Request next to your application.
- Review the Booth Request Instructions and view the Event Site Map, if applicable.
- Answer the questions provided by the event.
- Click Save Progress to save your responses before leaving the page.
- Click Submit to submit your booth request.
- NOTE: You will not be able to edit your booth request after submitting. Ensure all questions are answered correctly before submitting your booth request.
- Once submitted, you can review your booth request by clicking Review Booth Request in the Actions section of your application.
- If the event organizers allow booth request edits, you can edit your booth request by clicking Edit Booth Request.

Reviewing Payments
All payments made on ZAPP are stored on the My ZAPPlications page. To review the receipt for a purchase, find the application it is associated with and click on the payment. Clicking on the payment will bring up a receipt.
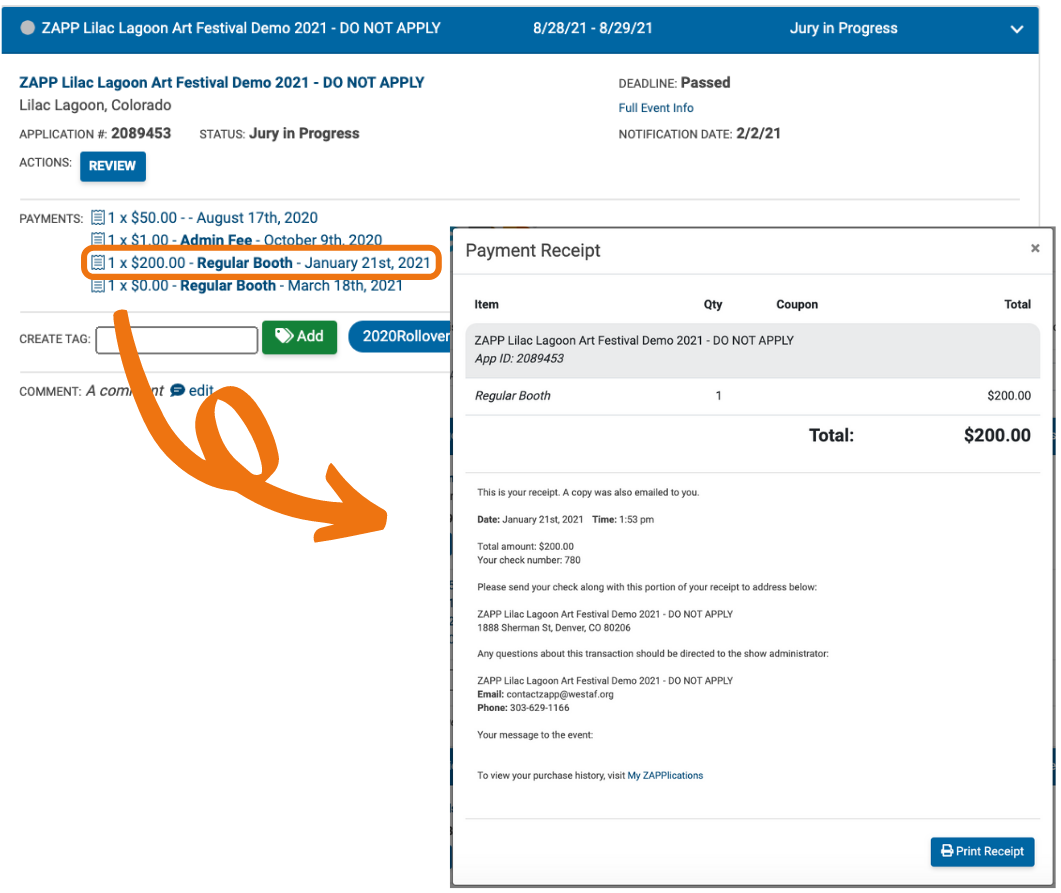
On your receipt, you will see all transaction information including the purchase total, the application ID associated with the purchase, event contact information, and any notes you left on your payment for the event administrators. If you indicated you would pay by check, you will also be able to reference the location to send the check to on your receipt. Click the “Print Receipt” button to either print your receipt or save it as a PDF. Receipts are also emailed to the email address associated with your account.
To download ZAPP’s W-9 and learn more about ZAPP payments, visit our Tax Center.
Notifications
You can see copies of all emails sent to you by event organizers in the Notifications Center within your ZAPP account. The messages will also be sent to the email address in your account.
After logging in, click 🔔Notifications. You will see a list of emails sent to you by event organizers. Unread notifications are bold.
- Click on a row to view the email.
- Click on the checkboxes on the left to select multiple notifications, and click Mark as Read to mark them as read.
- Click Show Unread to view all notifications that have not been opened.

Note: Only emails dating back until January 1, 2023 are available to view in ZAPP. Emails do not include payment receipts.
Opt-In & Out of ZAPP System Emails
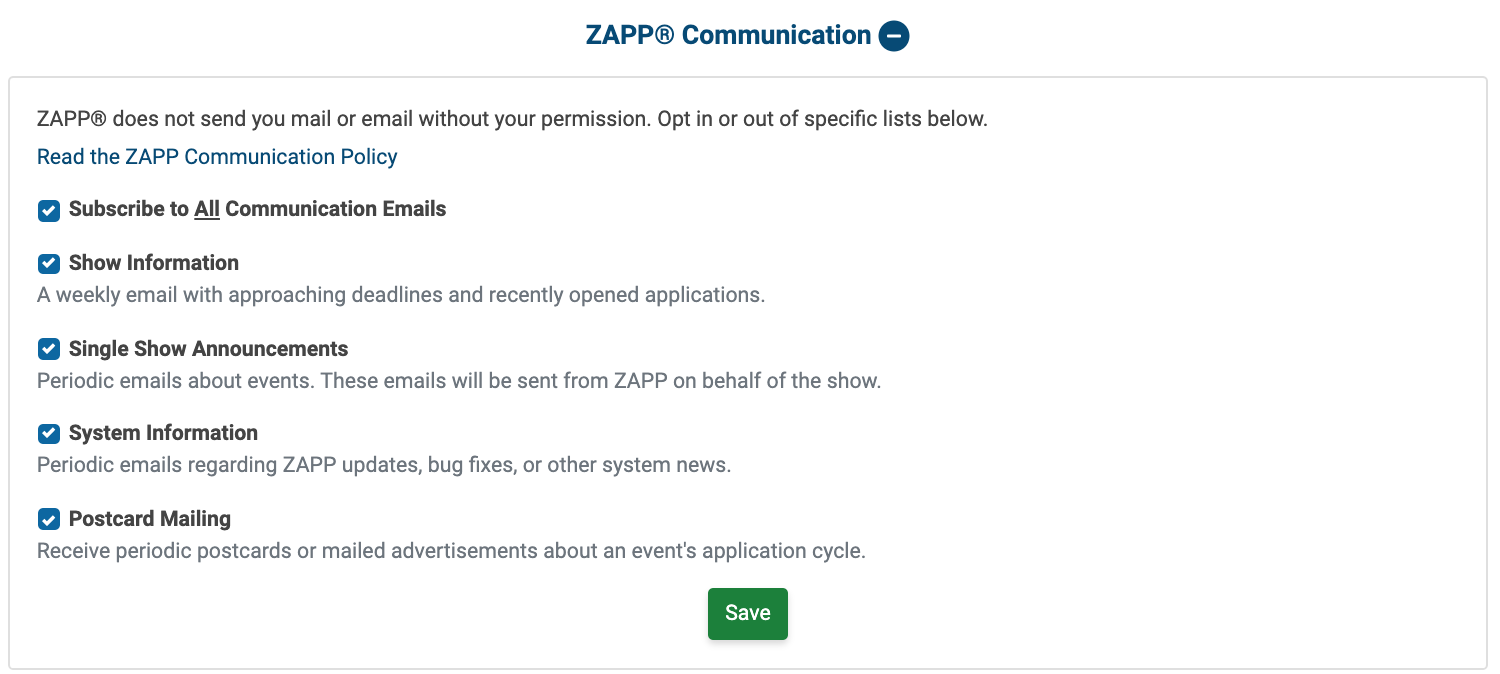
Under the My ZAPPlications table, you have the ability to opt in and out of emails ZAPP sends you (you can also do this on your Profile!). While you can’t opt out of receiving emails from events to which you have applied, we never want to send you emails you don’t want. To subscribe (or unsubscribe) from all email lists, click on the checkbox next to “Subscribe to All Communication Emails.”
What emails will I get in each email list?
- Show Information: Artists opted into this list will receive a weekly email on Wednesdays with a list of events with upcoming deadlines and events that have recently started accepting applications.
- Single Show Announcements: Artists opted into this list will receive periodic promotional emails about events. These emails are sent from ZAPP on behalf of the show.
- System Information: Artists opted into this list will be sent emails about new ZAPP features, upcoming updates, and other information about ZAPP.
- Postcard Mailing: Artists opted into this list may receive postcards or advertisements from events on ZAPP.
Questions about our Communication Policy? Review it here.