
The ZAPP Shop is the hub for all purchases. Anytime you need to pay for a jury or application fee, or purchase a booth, you’ll visit the ZAPP Shop to complete your purchase. If a product is available for you to purchase, it will be listed in the ZAPP Shop. You can access this page by clicking on the “My Cart” button on the upper right corner of your screen, by opening the menu and selecting ZAPP Shop, or by clicking the “Purchases” button on your My ZAPPlications page.
Purchasing Products on ZAPP
The “Purchases” button will only display on your My ZAPPlications page under applications that have booth products available for you to purchase.
The ZAPP Shop is divided into five main steps:
You can skip to any section once you have added products to your cart by clicking on the heading for the step you want to skip to.
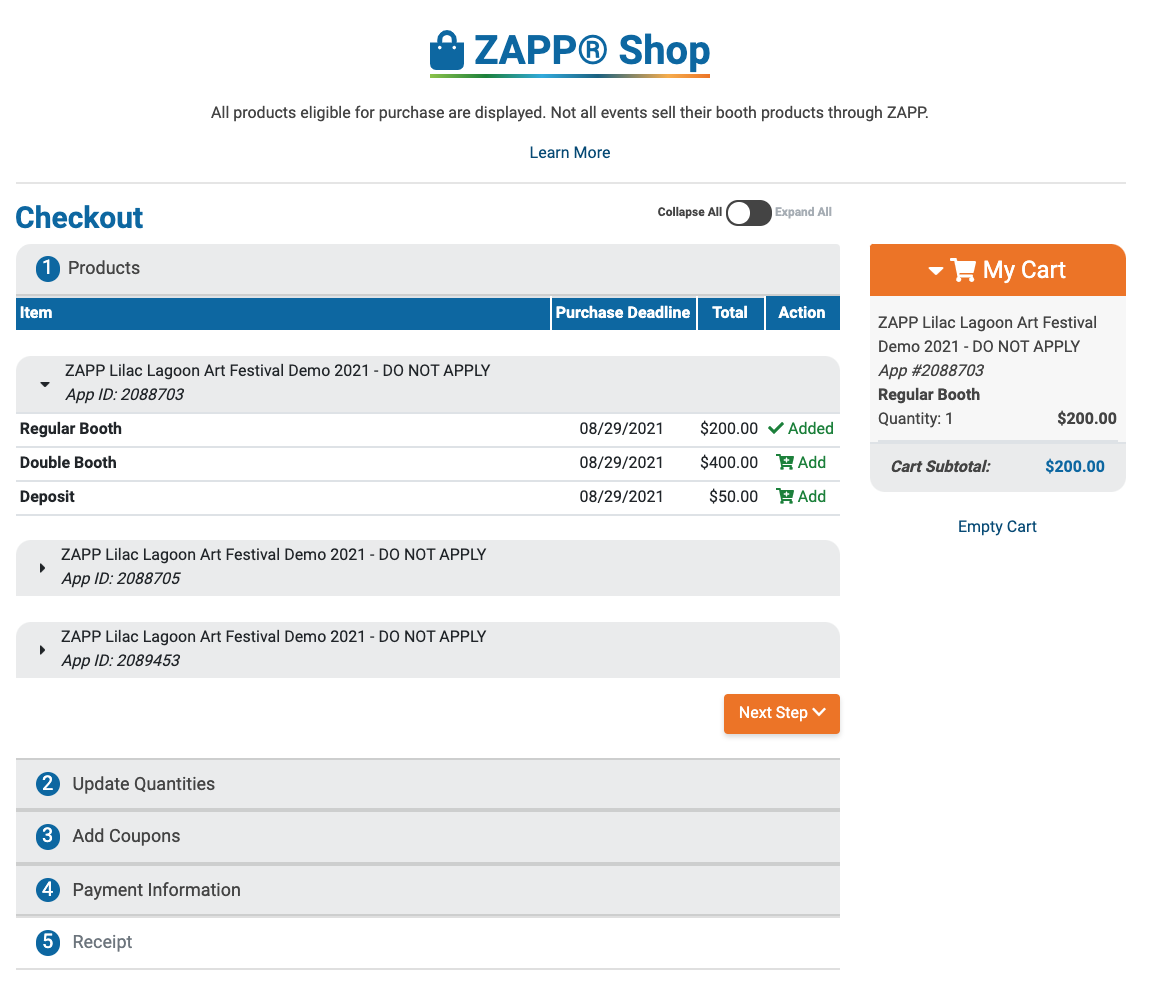
Your cart (on the right hand side of the screen) will display the products and your purchase total. Empty your cart at any time by clicking the “Empty Cart” link. Remove individual items from your cart using the Update Quantities step.
Looking for video tutorials? Check out our videos on Purchasing Application Fees and Purchasing Booth Products.
Step 1: Products
This section displays all available products, their cost, and their purchase deadlines. All products will be separated by the event they belong to. To add a product to your cart, click the green “Add” icon.
To see only products for a specific event, click on the arrow next to the other event names to hide their available products. You can collapse all sections to see a list of events with products available for your purchase by clicking the “Collapse All / Expand All” toggle.
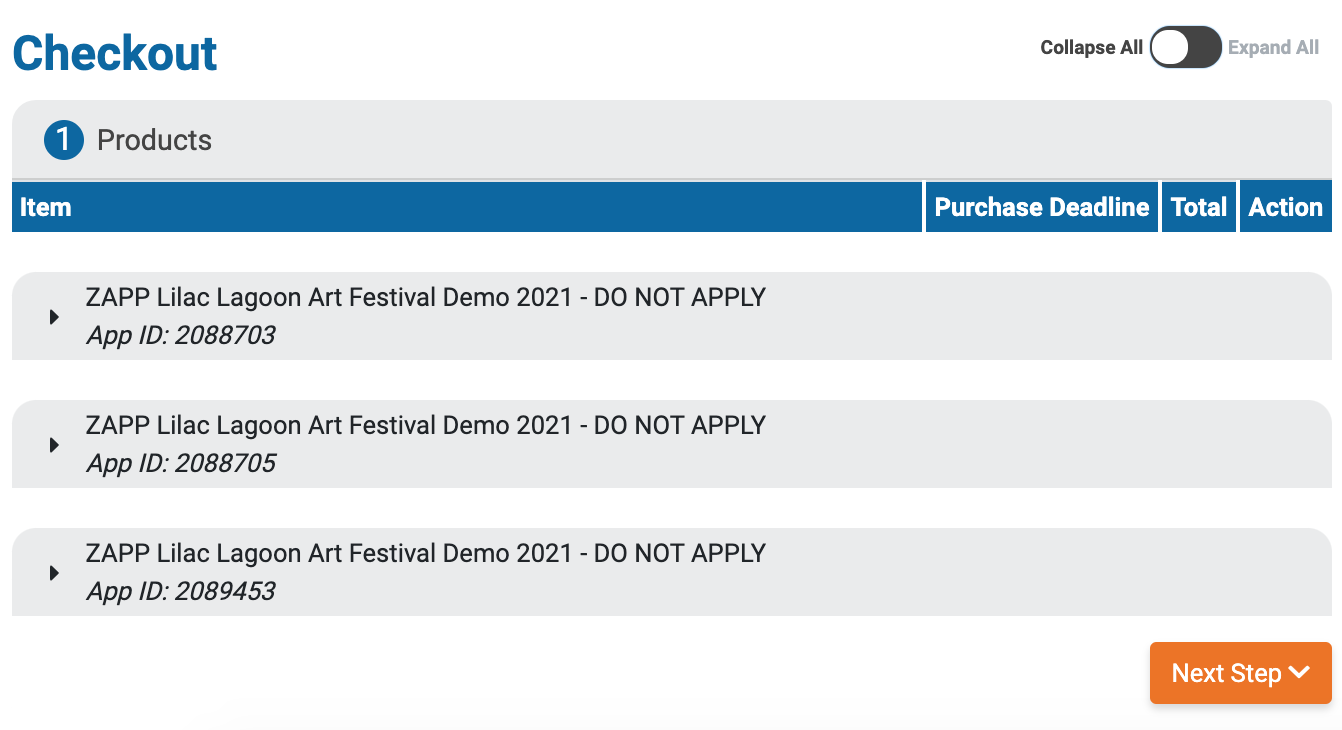
If you have multiple applications for one event, you will see more than one section for the same event. Each section will be differentiated by your Application ID. Learn more about Application IDs by reviewing Managing Applications on ZAPP.
If you have already purchased a product, you will see “Already purchased” next to the product name. Review your receipt for that product on your My ZAPPlications page if you have questions. If a product displays as “SOLD OUT,” the product is not available to purchase. Product limits are set by the event administrator and any questions about sold out products are best directed to them.
Step 2: Update Quantities
In this section, you can remove products from your cart or use the quantity dropdown to increase the number of products you are purchasing. Up to nine purchases of the same product can be made at one time. If the product is close to being sold out, you may not be able to increase the quantity to purchase
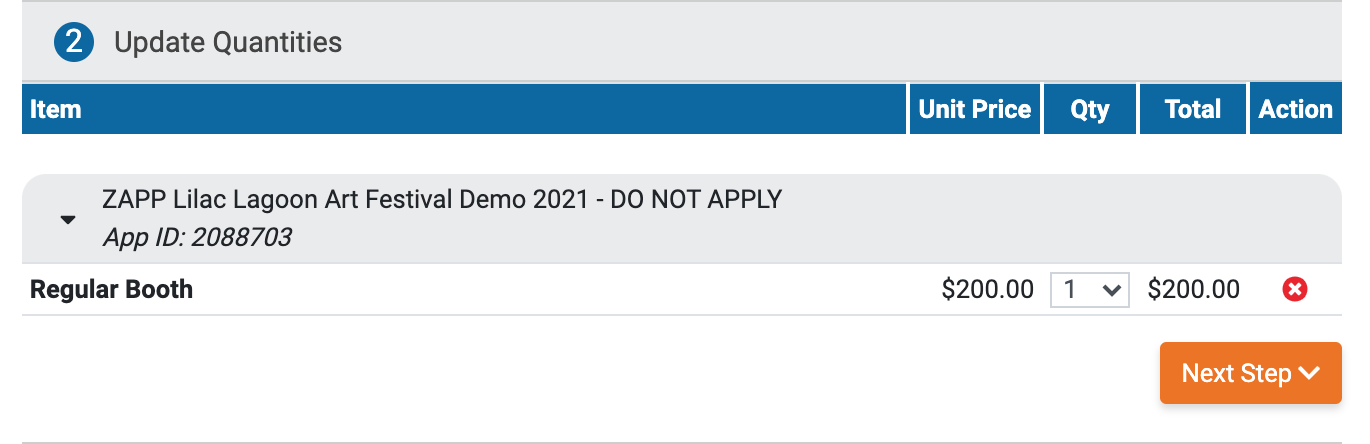
Many events sell double booth spaces separately — only purchase multiple booth products if instructed by the administrator.
Step 3: Add Coupons
In this section, you can add any coupon codes to apply discounts. To add a coupon code, simply type the code into the text box under Coupon and click the “Apply” button. The discount should appear on your total for that product and in your ZAPP Shop. Once the coupon has been successfully applied, check out as normal. If your balance due is $0, you still need to complete checkout by clicking Next Step and then Checkout Free Items.
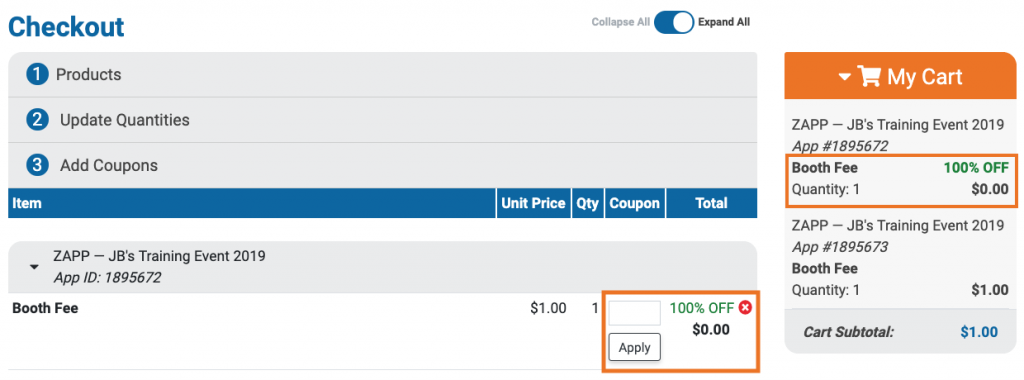
Click here for a full guide on checking out with a coupon code.
Step 4: Payment Information
In Payment Information, use the Payment Method drop-down menu to select how you want to pay. Events decide what payment types they will accept, and not all events will accept checks or credit card payments.
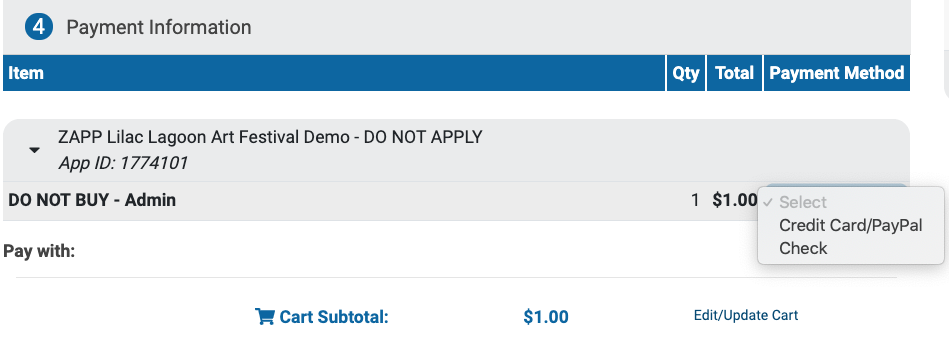
If you select to pay by Credit Card/PayPal from the dropdown, you will be able to choose between those payment methods. Any saved payment methods will display first. If you do not want to use your saved payment method, click the “Choose another way to pay” button.
You can save or delete payment methods in your Profile, under the Saved Payments section. Click here to learn more about managing payment methods in your ZAPP Profile.
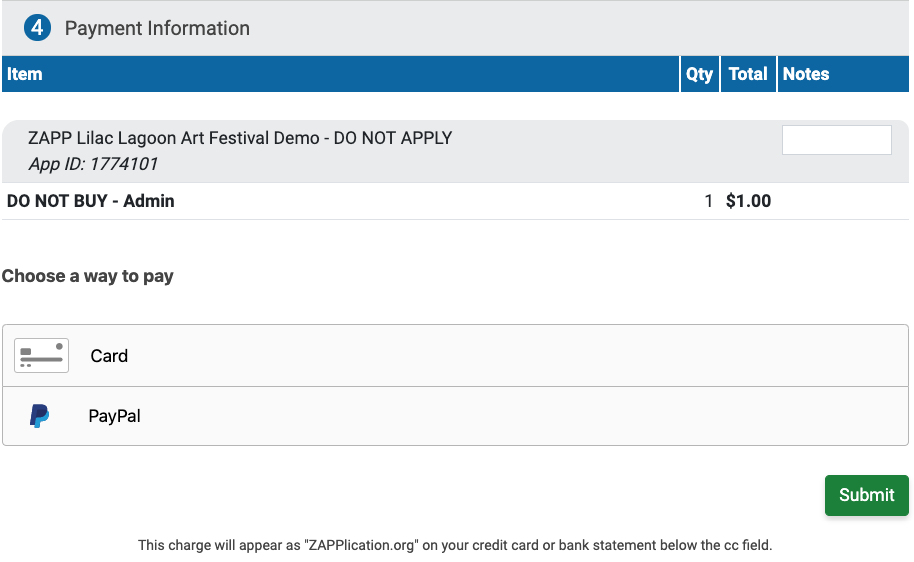
If you are not using a saved payment method, clicking PayPal will take you to the PayPal website where you can log in to your PayPal account and complete the transaction. If you choose to pay by card, the site will ask you to input your credit card information.
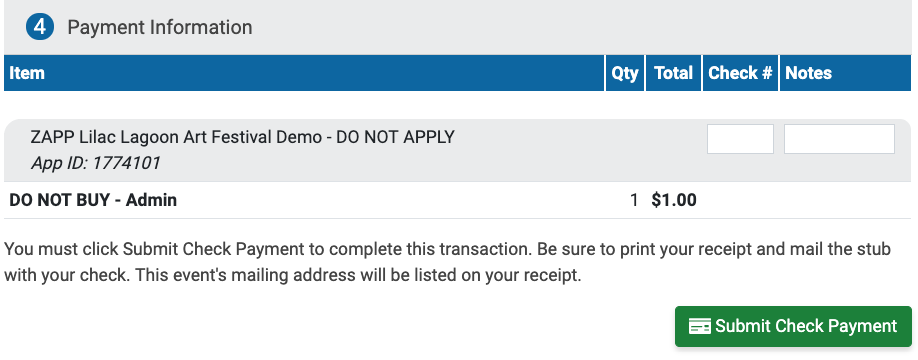
If you choose to pay with a check, you will be asked to input your check number. Check payments should be sent directly to the event. The address to send the check to will be listed on the receipt.
To check out, click the Submit button. If your payment did not go through or if you run into any issues, email us at contactzapp@wearecreativewest.org.
Step 5: Receipt
Once you have successfully submitted payment, you will see a receipt in this section and you will receive a receipt for the purchase to the email address listed in your ZAPP profile. Receipts can also be reviewed and downloaded at any time by clicking the payment listed on your My ZAPPlications page.
Requesting a Refund
Revenue collected on ZAPP belongs to the event organizers. As ZAPP is merely the tool events use to collect and manage applications and various fees, refund requests must be submitted by the event administrator. Once we receive a request from the event administrator, the refund will typically be processed within 1 – 2 business days, if we can process the request.
Once the refund has been processed, you will see a new receipt on your My ZAPPlications page for the refund.